The definitive guide to use the new Multiple Accounts and Address Book features in your TronWallet.

Multiple Accounts
With this latest release, we’d like to take a moment to talk about the two most in-demand additions to the app. First, being able to provide our users with a way to split their operations into multiple accounts has been a priority since its release, and here’s how it works:
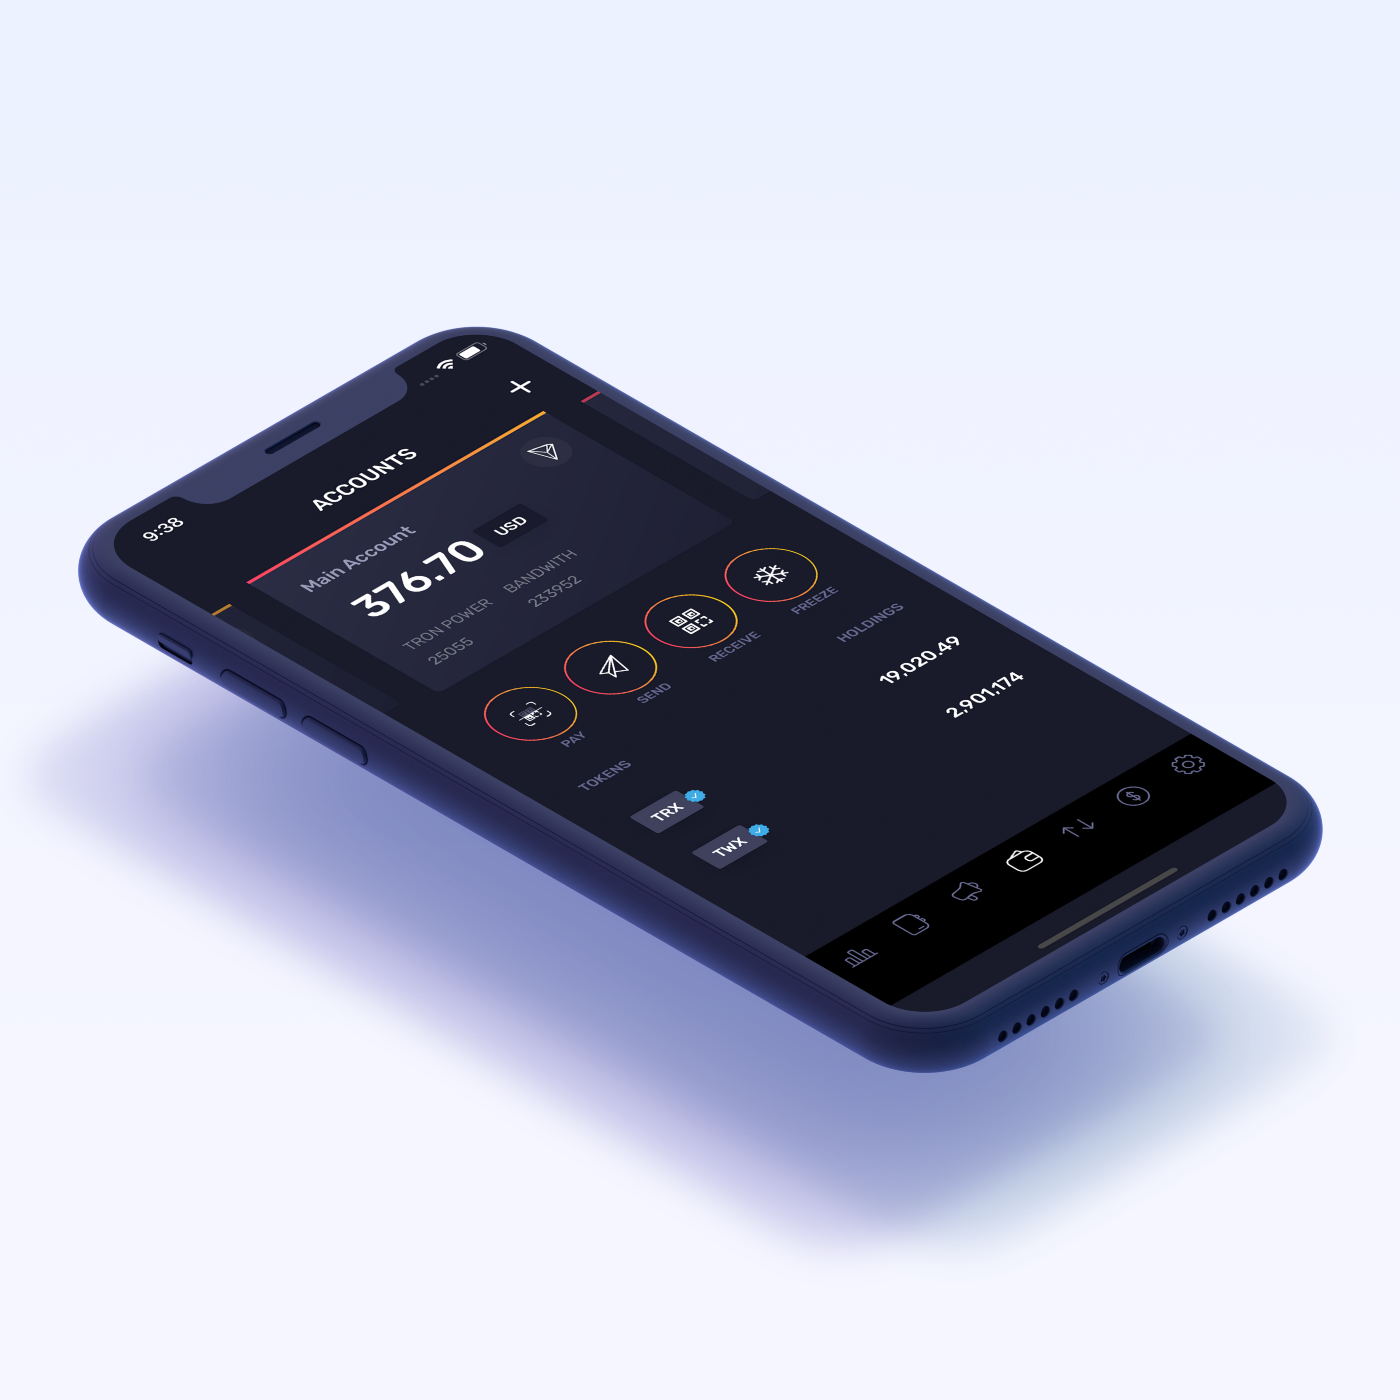
As you launch your app, you will notice that the first screen has changed. The information you were accustomed to seeing is still there but that screen is now called Accounts and is where the controls for your Multiple Accounts are. The card you see on top of the screen indicates which Account you have selected. At first, there will be a single card only but as you start using the app and create new accounts those will show up to the right and left of it and you will be able to select which will be active by swiping to that account.
To begin using that feature first tap on the top right button on the main screen. This will create a new account and automatically select it as current (this means any transactions within TronWallet are being completed on that account). Every time you swipe to a different account (dragging the screen to the right or left of the card in the center) your list of tokens, Tron Power, Bandwidth, and the rest of the information will change to reflect those of your selected account.

While your newly created account is automatically given a name, this release also comes with a new feature that allows you to edit your accounts as well as save your favorite addresses as contacts in a new tab called Address Book.
Address Book
Using this new tab is very straightforward. On the tab bar at the bottom of the screen, the third button from left to right will be your Address Book. Tap it and you will be taken to a screen with two tabs: Contacts and Accounts. They operate in a very similar way, listing your contacts or accounts and allowing you to manage them by tapping on the item you wish to interact with. In the case of contacts, you will find a floating button at the bottom of the screen that says Add Contact. Let’s begin by adding one. Tapping on that button will take you to the Add Contact Form.

After providing the name you will be prompted for an address before you can save your Contact. To remember a complex address is not trivial so instead of typing from memory, you can simply copy an address and paste it onto the form. If you have a specific address from a transaction that you would like to store, simply go to your transactions screen, find the one you want and tap on it. You will be taken to the transaction details screen and the address (if the transaction has any) will be displayed at the bottom.

Tapping on one will open a modal where you can select if you would like to simply copy the address or directly save it as a Contact. Both will work but if you choose to copy the address and return to your address book form, tap on the paste button, and with the name you have already provided, you will be ready to tap on the ADD button which will then add the Contact to your Contacts List.

This list will be the place where you will find all your Contacts and Accounts. Each item in that list can be tapped to open a modal with possible actions. The first is the Edit action, which allows you to Edit that Account or Contact. It looks and functions very similar to the Add Contact form with a few validations to make sure the item exists. The second action is self-explanatory, a delete function that removes the item from your list. The third is an easy and quick way to send tokens to a saved address. You will be redirected to the Send screen with your address already filled in. From there you just need to select the token, and the amount, and complete the transaction.
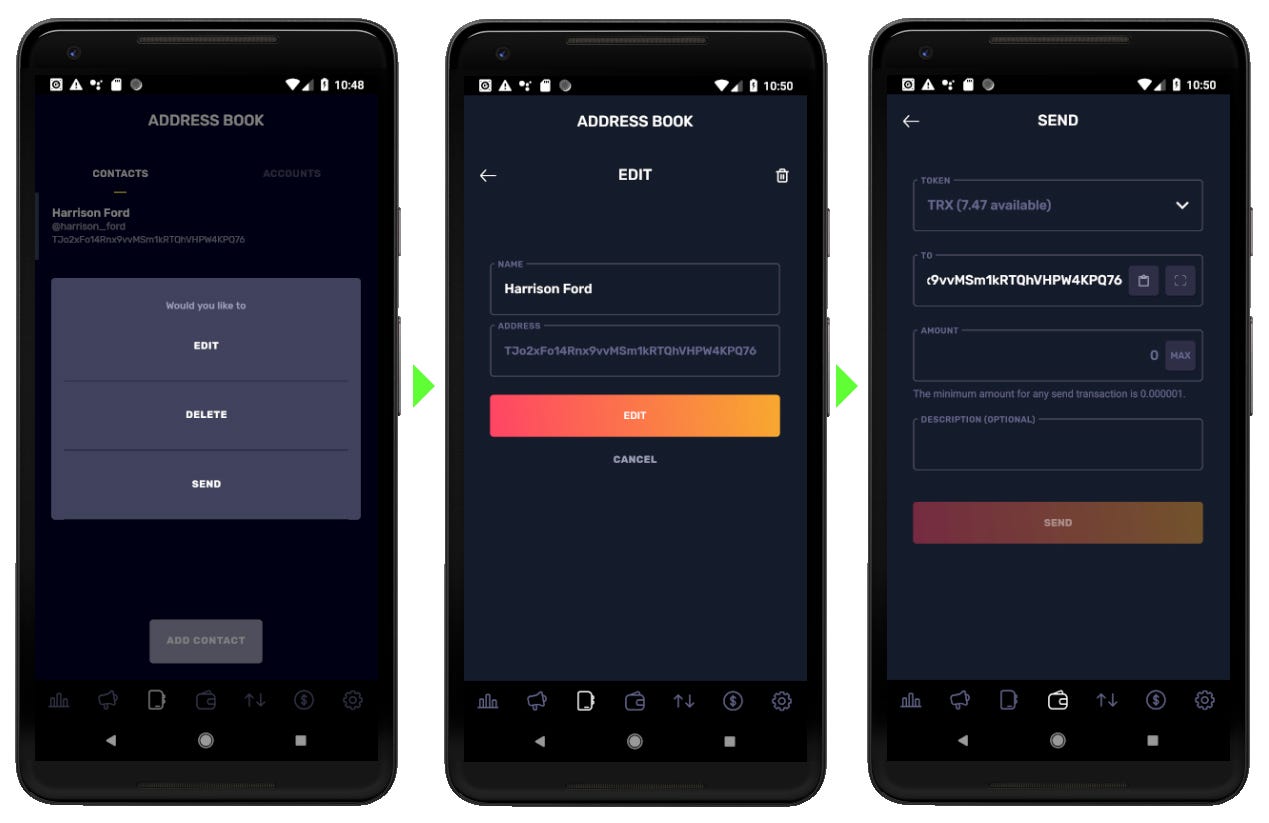
Both tabs (Contacts and Accounts) look and feel very similar, with the sole difference being that an account can’t be deleted. This contributes to a familiar feeling when using the new features.
Conclusion
This release comes with more than 100 bug fixes and improvements but these two were the features we were most excited to share with you. The community has been very vocal asking for the addition of Multiple Accounts and the ability to save frequently used addresses will make the experience of using the app that much easier. We would also like to thank the many contributors for translating our app into Spanish, Chinese, French, Portuguese and Dutch(CryptoSpaces).
A very big thank you from the TronWallet team!
What’s Next for TronWallet
So, we are always evaluating new features, and based on our users’ feedback we choose, focus, and build!
Some of the ideas we are evaluating right now: are premium features, a liquidity network with smart contracts (wow!), p2p exchange, cashback, and rewards programs using a utility token. Other ideas we are not covering? Please drop us a line and suggest features/ideas at: [email protected]
PS: Please check this step-by-step tutorial we prepared to better understand how to use TronWallet.